 微物联研究院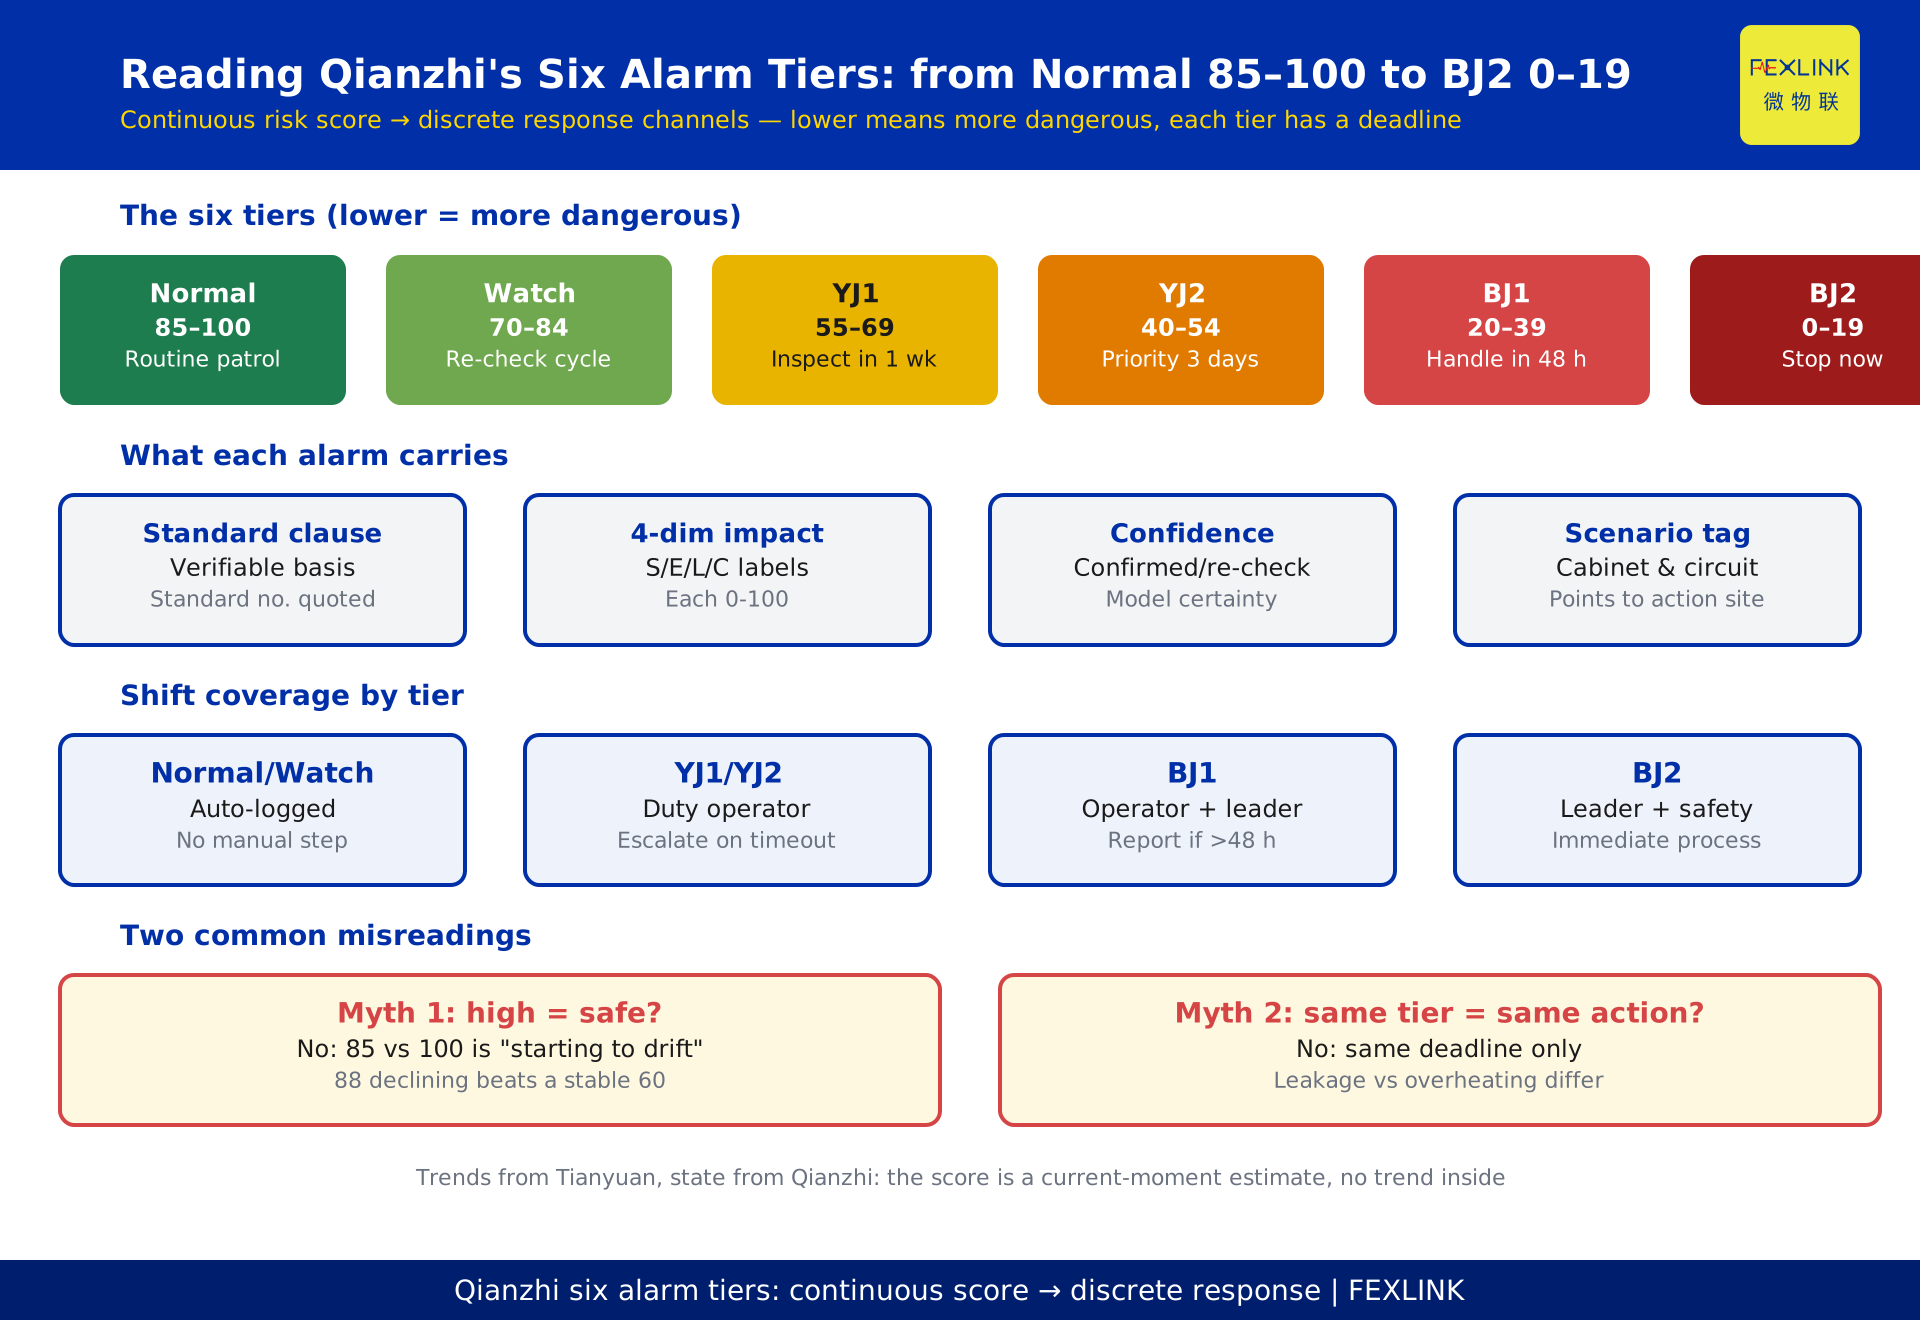
# Reading Qianzhi's Six Alarm Tiers: from Normal 85–100 down to BJ2 0–19
Direct Answer
The risk score on the platform is not a "higher is better" percentage system — it is a 0–100 scale where lower means more dangerous, divided into six tiers: Normal (85–100) → Watch (70–84) → YJ1 (55–69) → YJ2 (40–54) → BJ1 (20–39, handle within 48 hours) → BJ2 (0–19, stop immediately). The lower the score, the higher the risk, and every tier carries a fixed response deadline and action set, so duty staff never have to guess whether a score actually demands action.
For operations managers and duty operators, this article answers three questions: why a continuous risk score must be cut into discrete tiers at all; what action each tier maps to; and how shift scheduling and alarm escalation should be designed around the tiers. The desensitized scenario of "a campus distribution system" is used for illustration.
Why a 0–100 Risk Score Must Be Cut into Six Tiers
The Qianzhi engine scores multidimensional parameters with 50 sub-models and outputs a continuous 0–100 risk score. But handing "82.3" directly to a duty operator has two problems:
- Human operators do not handle continuous scales well. "73" versus "71" has no actionable difference in the field; operators need a clear instruction: act or not, and how fast.
- Response actions are discrete. Whether it is notification, observation, handling within 48 hours, or immediate shutdown, an action has no continuous form like "72.5 maps to 80% of an action." Tiers and actions must map one to one.
So the essence of tiering is mapping a continuous risk estimate onto discrete response channels: each tier corresponds to one response deadline and one action set, and by the time an alarm reaches the operator, the "translation" is already done.
The Six-Tier Mapping: Score Bands, Names, Meanings
The Qianzhi six-tier alarm system, from safe to dangerous:
| Tier | Score band | Name | Meaning |
|---|---|---|---|
| 1 | 85–100 | Normal | Parameters within expected range; routine patrol suffices |
| 2 | 70–84 | Watch | Minor deviation; keep an eye on it, re-check per cycle |
| 3 | 55–69 | YJ1 | Warning level 1; schedule an inspection soon |
| 4 | 40–54 | YJ2 | Warning level 2; prioritize inspection and evaluation |
| 5 | 20–39 | BJ1 | Alarm level 1; handle within 48 hours |
| 6 | 0–19 | BJ2 | Alarm level 2; stop immediately |
The naming logic: YJ stands for warning (预警), BJ for alarm (报警). Warning tiers (YJ1/YJ2) deal with hazards that can still be scheduled; alarm tiers (BJ1/BJ2) deal with problems that cannot wait. Lower tier means more danger — this is the most important anchor for the whole system: a low score should alert you, not read as "failed but not urgent."
Deadlines and Actions per Tier
Every tier binds a clear deadline and action; operators execute by the table:
| Tier | Deadline | Typical action |
|---|---|---|
| Normal | Routine cycle | Normal patrol; no extra intervention |
| Watch | Per review cycle | Log and observe; re-check that measurement point on the next patrol |
| YJ1 | Soon (within a week suggested) | Send a technician for on-site inspection to confirm the hazard |
| YJ2 | Priority (within 3 days suggested) | Prioritize inspection; denser monitoring if needed |
| BJ1 | Within 48 hours | Complete handling within 48 hours; if immediate repair is impossible, take temporary protective measures |
| BJ2 | Immediately | Stop/shut down immediately; isolate the risk first, analyze the cause later |
The deadlines are not arbitrary: YJ tiers allow time for "check and confirm"; BJ1 allows one complete maintenance window; BJ2 allows no waiting — it maps to immediate-risk scenarios such as electric shock and fire. When an operator sees the tier on the alarm card, they know which process to start.
Why BJ1/BJ2 Must Carry Time Windows
The two BJ tiers are the "cannot wait" levels. Binding time windows has two reasons:
- Preventing "watching it disappear." A hazard can deteriorate from BJ1 to a fault in a matter of days. 48 hours is a compromise that leaves room to schedule a repair without dragging past the danger point; BJ2 risks (such as residual current over the red line) can cause an incident at any moment and only allow immediate action.
- Making escalation executable. The time window is the basis for escalation — if a BJ1 alarm stays open past 48 hours, the system should escalate automatically (urgent push, notify the shift leader) instead of leaving the alarm sitting in a list. Without a time window, there is no trigger condition for escalation.
Together these two points turn an "alarm" from a message into a "task with a deadline."
Score Bands versus Field Feel
The mapping from continuous score to tier, in field-feel terms:
| Score band | Field feel |
|---|---|
| 85–100 | Everything normal, same as usual |
| 70–84 | One measurement point looks a bit off, but nothing you can name |
| 55–69 | Data keeps deviating; the engineer thinks "someone should take a look" |
| 40–54 | Clearly abnormal; production planning should start considering a maintenance window |
| 20–39 | Very dangerous; must be handled within 48 hours |
| 0–19 | Cut power now; protect people and equipment first |
The value of this table: tiers are designed for people, not for the algorithm. If an operator still hesitates over a 45 before reporting, the tiering has not entered daily working language; a properly landed tiering should give everyone muscle memory for "what to do at each band."
What Each Alarm Carries
Tiering is only the first layer of an alarm. A complete Qianzhi alarm also carries:
- Standard-clause reference: the basis for triggering (e.g., GB 13955 for leakage red line), telling handlers "on what grounds."
- Four-dimension impact labels: scores 0–100 each for safety/efficiency/life/carbon, showing which dimension this alarm mainly affects.
- Confidence: how sure the model is, helping handlers decide between "confirmed problem" and "needs verification."
- Scenario tag: the associated field location and scenario (which cabinet, which circuit), pointing to where to act.
The tier says "how urgent"; these fields say "what, where, and why." Together, an operator can complete an initial handling judgment without opening the system.
Designing Shift Coverage around the Tiers
The six tiers map directly onto shift-system design:
| Tier | Responder | Escalation condition |
|---|---|---|
| Normal / Watch | Auto-logged by system | None |
| YJ1 / YJ2 | Duty operator on shift | Not closed on time → escalate to shift leader |
| BJ1 | Duty operator + shift leader | Not handled in 48 hours → report to supervisor / auto-urgent |
| BJ2 | Shift leader + safety lead | Immediate emergency process; no waiting for chain-of-command |
The benefit: low tiers are digested by the system (logged and re-checked), high tiers have someone accountable end to end, and human effort concentrates on what is truly dangerous. Meanwhile, alarm compression (the system aggregates similar alarms) ensures operators see deduplicated effective alarms rather than repeated spam.
Two Common Misreadings: High Score = Safe, Same Tier = Same Urgency
Two misunderstandings need correction:
- "High score = safe" is wrong. 85–100 is normal, but the difference between 100 and 85 is "perfectly normal" versus "starting to drift," and scores near 85 deserve attention. More importantly, the score is a state estimate at the current moment and does not include trend — a measurement point at 88 but steadily declining deserves earlier intervention than one stable at 60. Watch trends with Tianyuan's predictions, state with Qianzhi's scores; use them together.
- "Same tier = same urgency" is wrong. Same tier only means the same response deadline, not the same handling method. Both BJ1, residual-current over-limit and line overheating require completely different actions; the standard clause, four-dimension labels, and scenario tag on the card determine "how to handle." The tier is a priority, not a prescription.
Scope and Limitations
This is the reading page for KD-0013. The six-tier alarm system (85–100 / 70–84 / 55–69 / 40–54 / 20–39 / 0–19) and "BJ1 within 48 hours, BJ2 immediately" come from the FEXLINK product knowledge base (six-tier alarm system) as standard product conventions; the suggested YJ1/YJ2 deadlines (within a week / within 3 days) are reference values summarized in this article and should follow the project's actual operations policy. The "campus distribution system" is a desensitized illustration. Tiering is a response priority and does not replace site procedures or human review; red-line scenarios (such as residual current ≥ 300 mA) follow the SAR pre-check and go directly into the BJ2 process, unaffected by weighted scoring. Alarm confidence and four-dimension labels are product-capability conventions; actual presentation follows product documentation.