 微物联研究院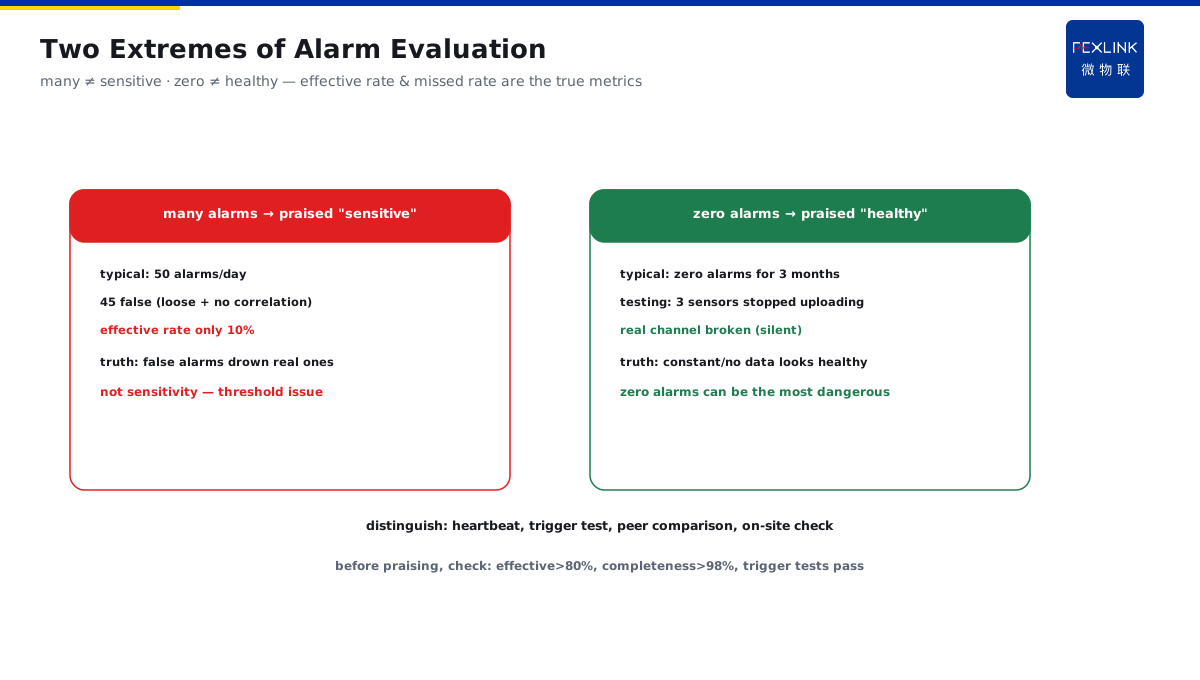
Direct Answer
Management is confused by alarm-volume data: many alarms are praised as "sensitive," zero alarms are praised as "well managed" — but both may actually be problems? The answer: both extremes deserve caution — high alarm volume with low effectiveness is usually loose thresholds and missing correlation, not sensitivity; long-term zero alarms require distinguishing true health from sensor failure/data interruption; correct evaluation looks at the "effective alarm rate" and "missed-alarm rate," not the total alarm count.
At one park's management meeting: System A averaged 50 alarms/day and was praised as "sensitive"; System B had zero alarms for three months and was praised as "well managed." Review: 45 of System A's 50 alarms were false (loose thresholds + no correlation conditions) — effective alarm rate only 10%; testing revealed 3 of System B's sensors had stopped uploading data ("silent failure") — the real alarm channel was broken. Rectification: System A converged thresholds; System B repaired sensors and added data heartbeat monitoring. Evaluation core: alarm volume explains nothing about health — look at effective alarm rate and missed-alarm rate; both extremes can be problems.
Because:
- Many alarms ≠ sensitivity: loose thresholds/missing correlation generate lots of false alarms;
- Zero alarms ≠ health: sensor failure/data interruption "silently" miss alarms;
- Effective alarm rate: real alarms ÷ total alarms — the correct measure of sensitivity;
- Missed-alarm rate: share of real anomalies not reported — the safety bottom line.
Key insight: "effective alarm rate + missed-alarm rate" are the two true metrics of an alarm system. Alarm volume indicates neither sensitivity nor health — data quality and channel state are what matter.
One data center was praised for "zero alarms" for six months, until a busbar overheating burnout (the temperature sensor had long since failed with poor contact, data always showing normal values). Review: sensor failure undetected (no heartbeat monitoring), data interruption unalarmed. Lesson: zero alarms can be "the most dangerous signal" — sensor failure goes silent; channel verification matters more than alarm volume.
1. Why "Many Alarms = Sensitive" Is Wrong
Step one: why many alarms are not a good thing.
False-alarm sources:
- Loose thresholds: alarm threshold too low, normal fluctuations trigger;
- Missing correlation: single-indicator alarms report on interference (startups/fluctuations);
- Not tuned: default thresholds do not fit on-site conditions;
- Sensor problems: poor contact/wrong location produce false signals.
Cost of many alarms:
- O&M fatigue: alarms drown the real signal (cry-wolf effect);
- Disposal efficiency: false alarms consume processing resources;
- Trust erosion: alarms become "normal," real alarms ignored;
- Problem masking: many false alarms hide real faults.
Correct understanding of "sensitive":
- Sensitive = no real alarm missed (no missed alarms);
- Sensitive ≠ many alarms (many false alarms is exactly insensitivity);
- Effective alarm rate: high share of real alarms means sensitive;
- High sensitivity + low false alarms: reasonable thresholds + correlation conditions (ideal state).
Key insight: "many alarms" is often a sign of "insensitivity." Many false alarms = threshold/correlation problems; the effective alarm rate is the measure of sensitivity.
2. The Trap of "Zero Alarms = Health"
Step two: why zero alarms cannot be trusted directly.
True health vs false quiet:
- True health: equipment indeed has no anomaly (data normal + channel normal);
- False quiet: sensor failure/data interruption ("silent" missed alarms);
- Distinguishing key: channel-state verification (heartbeat/self-check);
- Verification method: trigger test (simulate over-limit to confirm it can alarm).
Silent-failure scenarios:
- Sensor damaged: data unchanged (stuck at a normal value);
- Communication interrupted: data not uploaded (platform has no data);
- Battery exhausted: wireless sensor offline;
- Poor contact: data drift (looks like normal fluctuation).
Zero-alarm checks:
- Check whether data keeps uploading (heartbeat);
- Compare with similar equipment data (reasonableness);
- Periodic trigger tests (simulate alarm to verify channel);
- On-site sampling (actual measurement vs platform comparison).
Key insight: for zero alarms, first ask "is the channel still open?" Data heartbeat + trigger tests — confirm "true health" rather than "false quiet."
3. Counter-Evidence for Sensor Failure
Step three: how to prove "zero alarms" is credible.
Counter-evidence methods:
- Trigger test: simulate over-limit (temperature heating/signal injection) to confirm alarm;
- Data comparison: compare similar equipment/adjacent points (reasonableness);
- Heartbeat monitoring: data-upload continuity (alarm on dropout);
- On-site measurement: IR thermometry/multimeter cross-check with platform data.
Test points:
- Testing does not disturb operation (safe simulation);
- Record test results (channel-verification archive);
- Periodic tests (quarterly/semi-annual);
- Failure found in testing: repair immediately and re-test.
Failure-case analysis:
- Temperature sensor poor contact: constant data (looks healthy);
- Communication module fault: data interrupted (platform no updates);
- Battery exhausted: wireless sensor offline;
- Wiring oxidation: data drift (abnormal amplitude).
Key insight: "trigger test + heartbeat monitoring" is the counter-evidence for zero alarms. Channel verifiable, failure discoverable — only then is zero alarms credible.
4. Correct Evaluation Metrics
Step four: what metrics to look at.
Core metrics:
- Effective alarm rate = real alarms ÷ total alarms (sensitivity);
- Missed-alarm rate = unreported real anomalies ÷ total real anomalies (safety bottom line);
- Data completeness = actual data points ÷ expected data points (channel state);
- Sensor online rate = online sensors ÷ total (asset state).
Supporting metrics:
- Average alarm-handling time (efficiency);
- False-alarm type distribution (improvement direction);
- Alarm repeat rate (same point repeatedly alarming);
- Threshold reasonableness (effective-alarm-rate trend).
Evaluation methods:
- Monthly statistics: effective-alarm-rate and missed-alarm-rate trends;
- Trigger tests: periodic channel verification (missed-rate estimation);
- Data-quality reports: completeness and online rate;
- On-site review: sample-check alarm authenticity.
Key insight: evaluate with "effective alarm rate + missed-alarm rate + data completeness." Alarm volume is not a metric — data quality and alarm effectiveness are.
5. The Necessity of Periodic Verification
Step five: how to stay credible.
Verification content:
- Sensor-state verification (online/failed);
- Data-quality verification (completeness/reasonableness);
- Alarm-channel verification (trigger tests);
- Threshold-reasonableness verification (false-rate trend).
Verification cycles:
- Sensor online rate: monthly;
- Data completeness: monthly/quarterly;
- Trigger tests: quarterly/semi-annual;
- Threshold review: quarterly or on condition change.
Verification closed loop:
- Find problem → locate cause → repair → re-test;
- Archive records (verification file);
- Track metric trends (continuous improvement);
- Link with management reporting (data speaks).
Key insight: "periodic verification" is the guarantee of alarm-system credibility. Sensors + data + channel + thresholds — a four-item verification loop keeps the system trustworthy.
6. Product Landing: Digital Electrical Intelligent Supervision System
FEXLINK products land alarm evaluation:
- Effective-alarm-rate reports: real-alarm share auto-statistics;
- Data heartbeat monitoring: sensor dropout/failure alarms immediately;
- Trigger-test tools: simulate alarms to verify channels;
- Data-completeness reports: data-quality visualization.
Design principle in one sentence: "look at effective alarm rate and missed-alarm rate, not alarm volume." Data quality + channel state — alarm evaluation with evidence.
Management-report example:
- Before reporting "system is sensitive": check the effective alarm rate (>80% counts as sensitive), not the total alarm count;
- Before reporting "system is normal": check data completeness and online rate (>98% counts as a healthy channel), not "no alarms";
- Suggested template: this month's effective alarm rate X% (trend up), data completeness X%, N trigger tests all passed, 0 missed alarms (test basis) — speak with metrics, not "many/few alarms."
7. Common Evaluation Misconceptions
- Many alarms = sensitive: mistaking false alarms for sensitivity. Consequence: O&M fatigue + real signals drowned. Correct: look at the effective alarm rate.
- Zero alarms = healthy: without channel verification. Consequence: silent sensor failure and missed alarms. Correct: heartbeat monitoring + trigger tests.
- Reporting only the total: management sees only alarm counts. Consequence: the real situation is masked. Correct: effective alarm rate + missed-alarm rate + completeness.
- No sensor verification: installed and forgotten. Consequence: failure unknown (constant data). Correct: periodic state verification.
- Raising thresholds to escape: raising thresholds for quiet. Consequence: real anomalies unreported. Correct: data-driven threshold tuning.
Scope and Limitations
This article clarifies the two misconceptions "many alarms = sensitive" and "zero alarms = healthy," and provides a correct evaluation framework for alarm systems (effective alarm rate, missed-alarm rate, data completeness, periodic verification), applicable to alarm evaluation and management reporting of electrical monitoring systems. Specific metric-statistics definitions must be determined by system functionality and on-site management requirements; trigger tests must be performed under safe conditions (without disturbing operation); verification cycles can be adjusted to on-site O&M practices. All cases are anonymized (a certain park/a certain data center/a certain plant) and do not refer to any specific customer.